
Witajcie!

- tekturki w morskim stylu: https://www.laserowelove.pl/pl/p/Tekturka-Latarnia-morska-i-ster-Ocean-Adventure/2494
- Tekturkę z napisem: https://www.laserowelove.pl/pl/p/Tekturka-Napisy-Trzymaj-sie-wiatru-Nautical-Holidays/4751
- klej
-nożyczki
-kostki dystansujące
-koronkę
-kalkę techniczną
-czerwoną wstążkę
-papierowy kwiat
-kryształki
What to prepare?
- papers from Men's World Set collection from Lexi design (sheets 02 and 04) https://www.laserowelove.pl/pl/p/Mens-World-SET-zestaw-papierow-30%2C5-cm-x-30%2C5-cm-Lexi-Design/6018
- chipboards in marine style: https://www.laserowelove.pl/pl/p/Tekturka-Latarnia-morska-i-ster-Ocean-Adventure/2494
- chipboard with an inscription: https://www.laserowelove.pl/pl/p/Tekturka-Napisy-Trzymaj-sie-wiatru-Nautical-Holidays/4751
- glue
-scissors
-spacers
-cork
-calico paper
-red ribbon
-paper flower
-crystals

Krok 1
Wycinamy biały prostokąt 7 x 10,5 cm
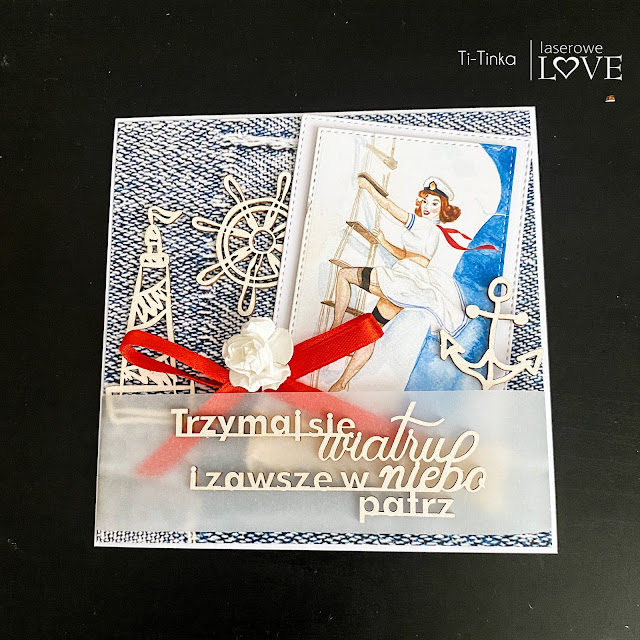
Step 1 Prepare a 13x13 card base Cut out a 12.5 x 12.5 square from Men's World 02. From Men's World 04, cut out the Captain's theme in a rectangle 6 x 9.5 cm Cut out a white rectangle 7 x 10.5 cm

Krok 2
Napis z tekturki naklejamy na pasku z kalki technicznej o szerokości ok 4 cm i długości ok 17 cm.
Step 2 Glue the chipboard inscription onto a strip of tracing paper about 4 cm wide and 17 cm long.


Krok 3
Sklejamy ze sobą biały prostokąt i prostokąt z grafiką. Używamy do tego kostek dystansujących.
Step 3 Glue the white rectangle and the rectangle with the graphic together. We use spacing cubes for this.

Krok 4
Naklejamy grafikę na jeansowy kwadrat, również przy pomocy kostek dystansujących.
Step 4 Apply the graphic to the denim square, also using spacers.

Krok 5
Dół grafiki ozdabiamy koronką samoprzylepną.
Step 5 Decorate the bottom of the graphic with adhesive lace.

Krok 6
Pasek z kalki naklejamy na jeansowy kwadrat. Zostawiamy lekki luz od góry, a „zbyt długie” boki podklejamy z tyłu arkusza. Następnie naklejamy arkusz na bazę.
Step 6 Glue the carbon paper strip onto the denim square. Leave a little slack from the top, and tape the "too long" sides to the back of the sheet. Then, glue the sheet onto the base.

Krok 7
Dodajemy papierowy kwiat i kokardkę z czerwonej wstążki.
Step 7 Add a paper flower and a bow of red ribbon.

Krok 9
Ozdabiamy pracę kryształkami samoprzylepnymi.
Step 9 Decorate your work with adhesive crystals.


Kartka cudna 😀. I dziękuję za super fajny kursik 😀
OdpowiedzUsuń