
Witajcie!
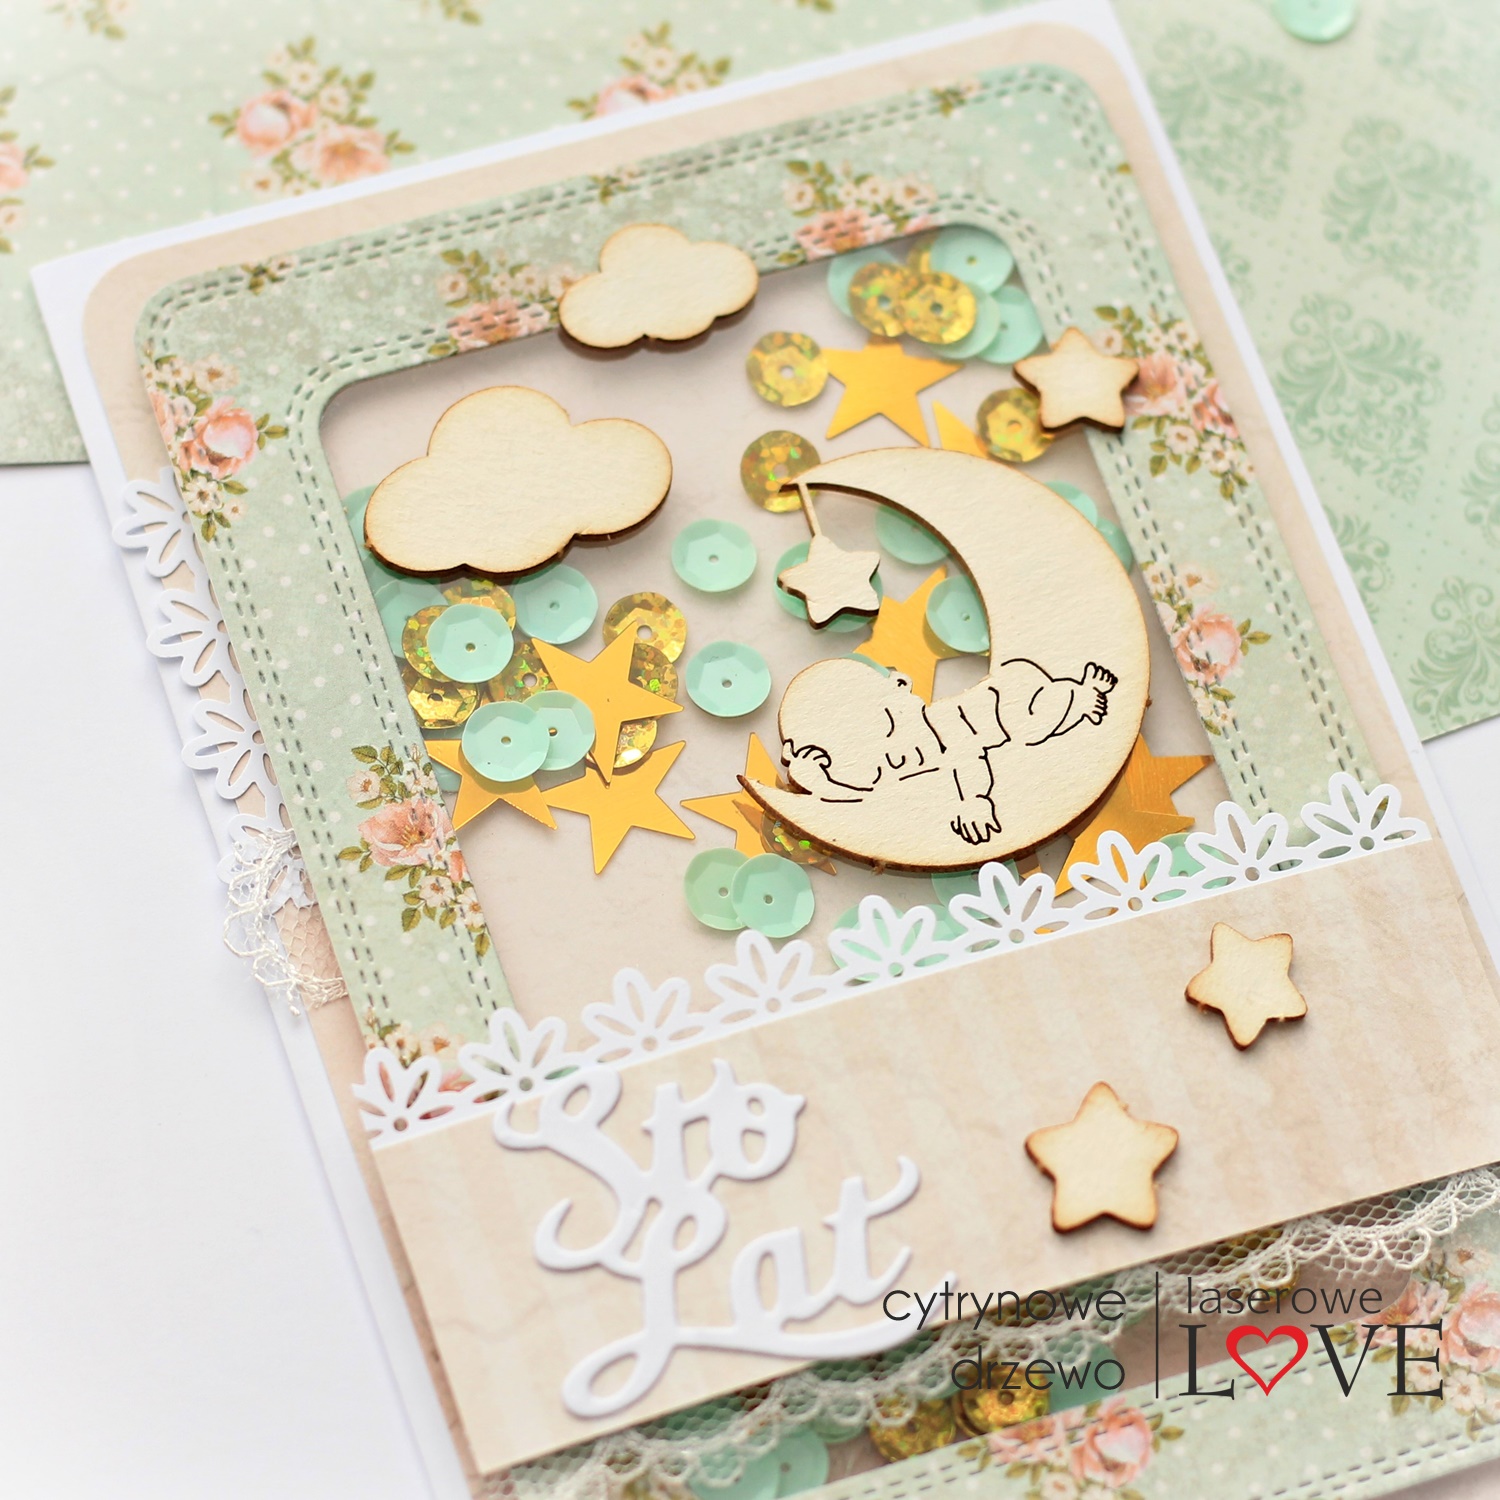
Kartki urodzinowe dla dzieci mogą być wyzwaniem, ale nasza edukatorka Ania Cytrynowe Drzewo przychodzi z pomocą i pomysłem na zaskoczenie małego solenizanta. Ania przygotowała dla Was krótki kurs step-by-step na kartkę urodzinową dla dziecka z shaker-boxem.
U Ani tym shaker boxem będzie ramka, która zazwyczaj służy za ramkę na zdjęcia w albumach. Ale jeśli nie macie takiego wykrojnika, bez trudu poradzicie sobie z linijką i nożyczkami.
Ania użyła tym razem energetycznej kolekcji papierów Laserowe Love – Vintage Trip oraz tekturek Laserowe Love z kolekcji Goodnight sweety – Emma & Billy. Pełen spis materiałów wraz z linkami znajdziecie na końcu posta.
Hello Friends! Birthday cards for kids can be a challenge, but our educator Ania Cytrynowe Drzewo comes with help and an idea to surprise the little birthday child. Ania has prepared for you a short step-by-step course on how to make a shaker box birthday card for a child. In Ania's case this shaker box will be a frame, which usually serves as a frame for photos in albums. But if you don't have such a die cutter, you can easily use a ruler and scissors. This time Ania used the energetic collection of Laserowe Love papers - Vintage Trip and Laserowe Love chipboards from the Goodnight sweets collection - Emma & Billy. Full list of materials and links can be found at the end of the post.


Krok 1 – Przygotowanie bazy
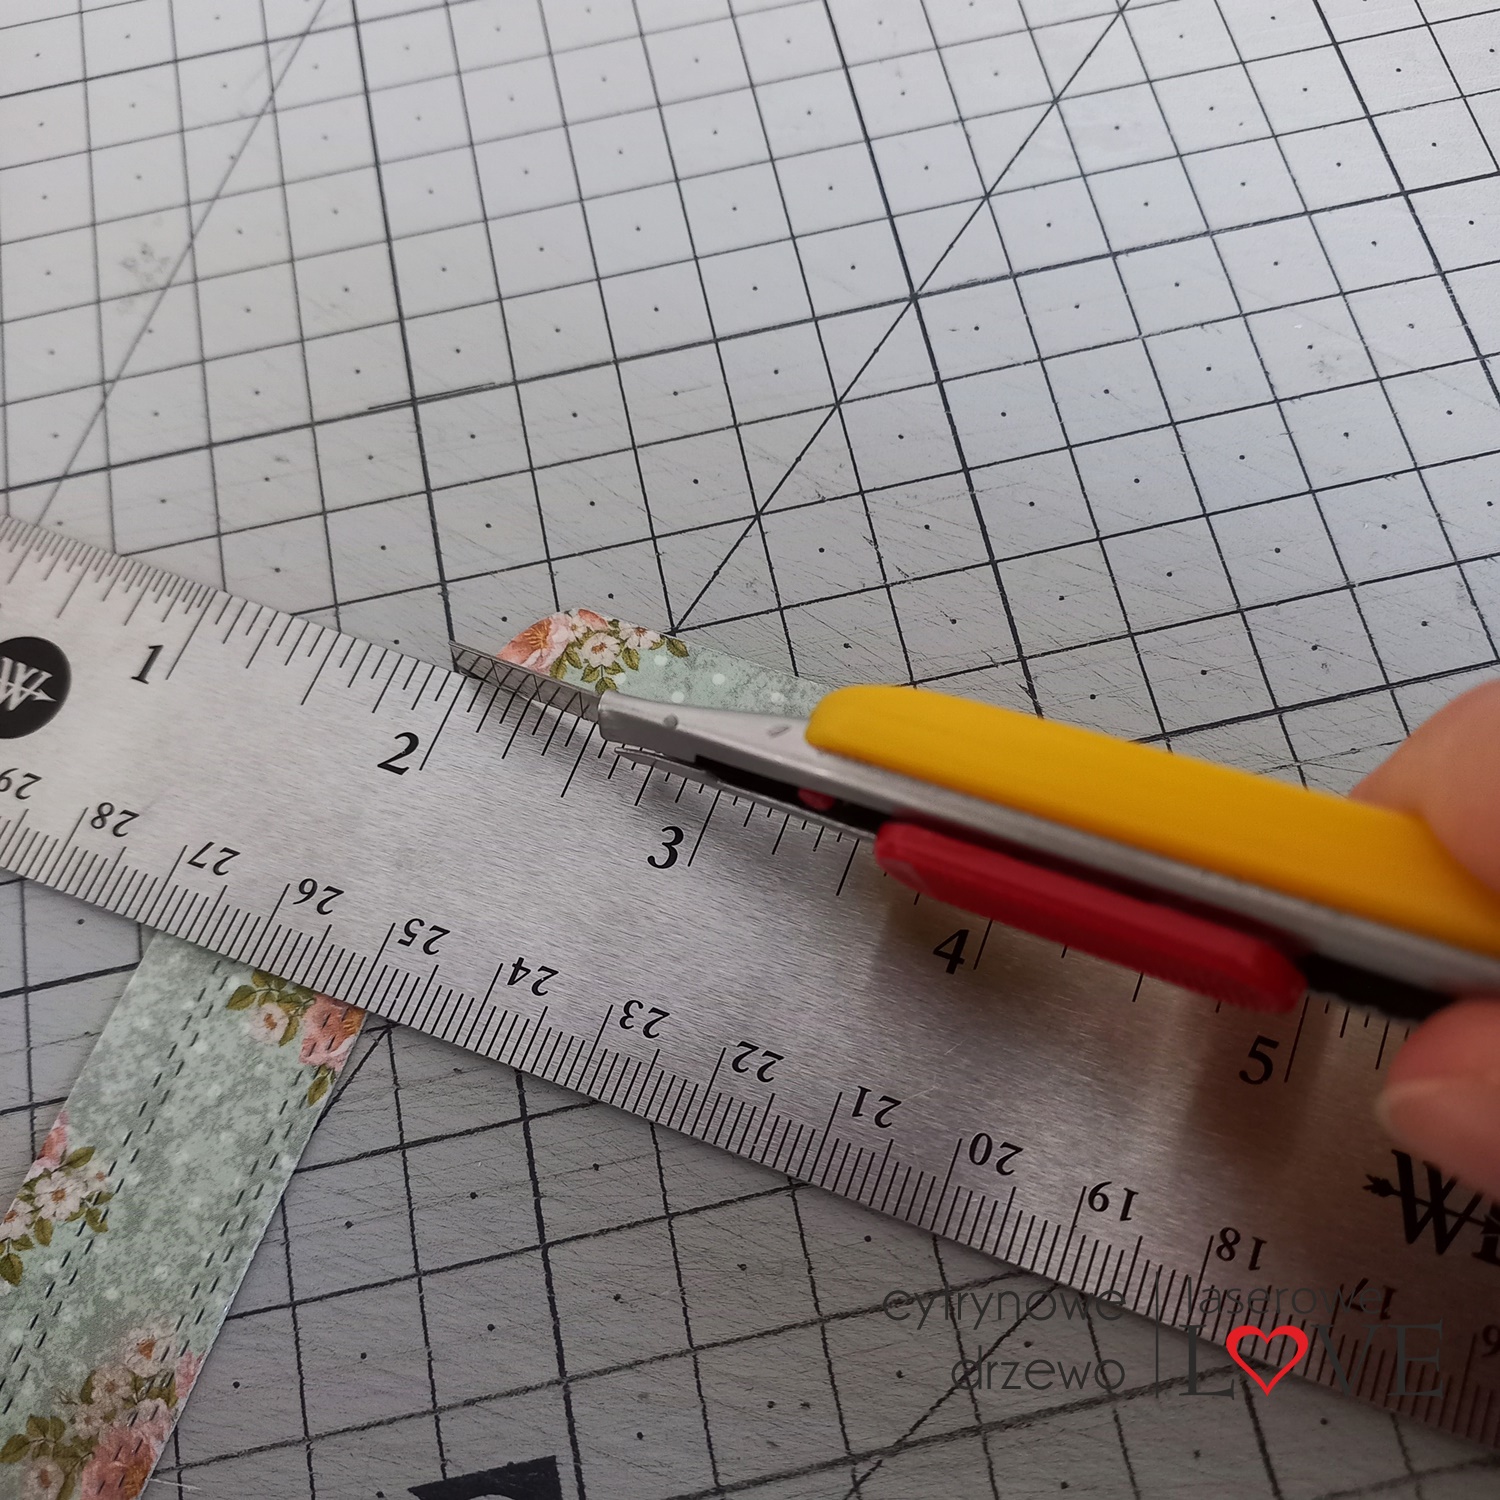
A) W przypadku posiadania odpowiedniego wyjrojnika, wytnijcie ramkę na zdjęcie, następnie odetnijcie od niej rogi, które służą do jej przyklejania (tutaj są zbędne). Ramkę przyłóżcie do kartki A4 (gramatura ok. 220-250) i zaznaczcie miejsce bigowania. Zbigujcie kartkę, złóżcie i zaznaczcie miejsce cięcia. Po docięciu kartki na górze i z boku mamy gotową bazę w formacie ok. 11,5 x 17 cm.
B) Jeśli nie macie wykrojnika, wytnijcie w papierze z kolekcji Vintage Trip prostokąt ok. 2 cm mniejszy od Waszej bazy kartki. Wytnijcie w tym papierze ramkę ok. 2 cm szerokości.
Step 1 - Preparing the base A) If you have the right die-cutting tool, cut out a photo frame, then cut off the corners which are used to glue it (not needed here). Place the frame on an A4 sheet of paper (approx. 220-250 weight) and mark the crease. Close the card, fold it and mark the cutting place. After cutting the card on the top and on the side you have a ready base in format about 11,5 x 17 cm.
B) If you do not have a die cutter, cut a rectangle in the paper from the Vintage Trip collection approx. 2 cm smaller than your card base. Cut out a frame about 2 cms wide in this paper.


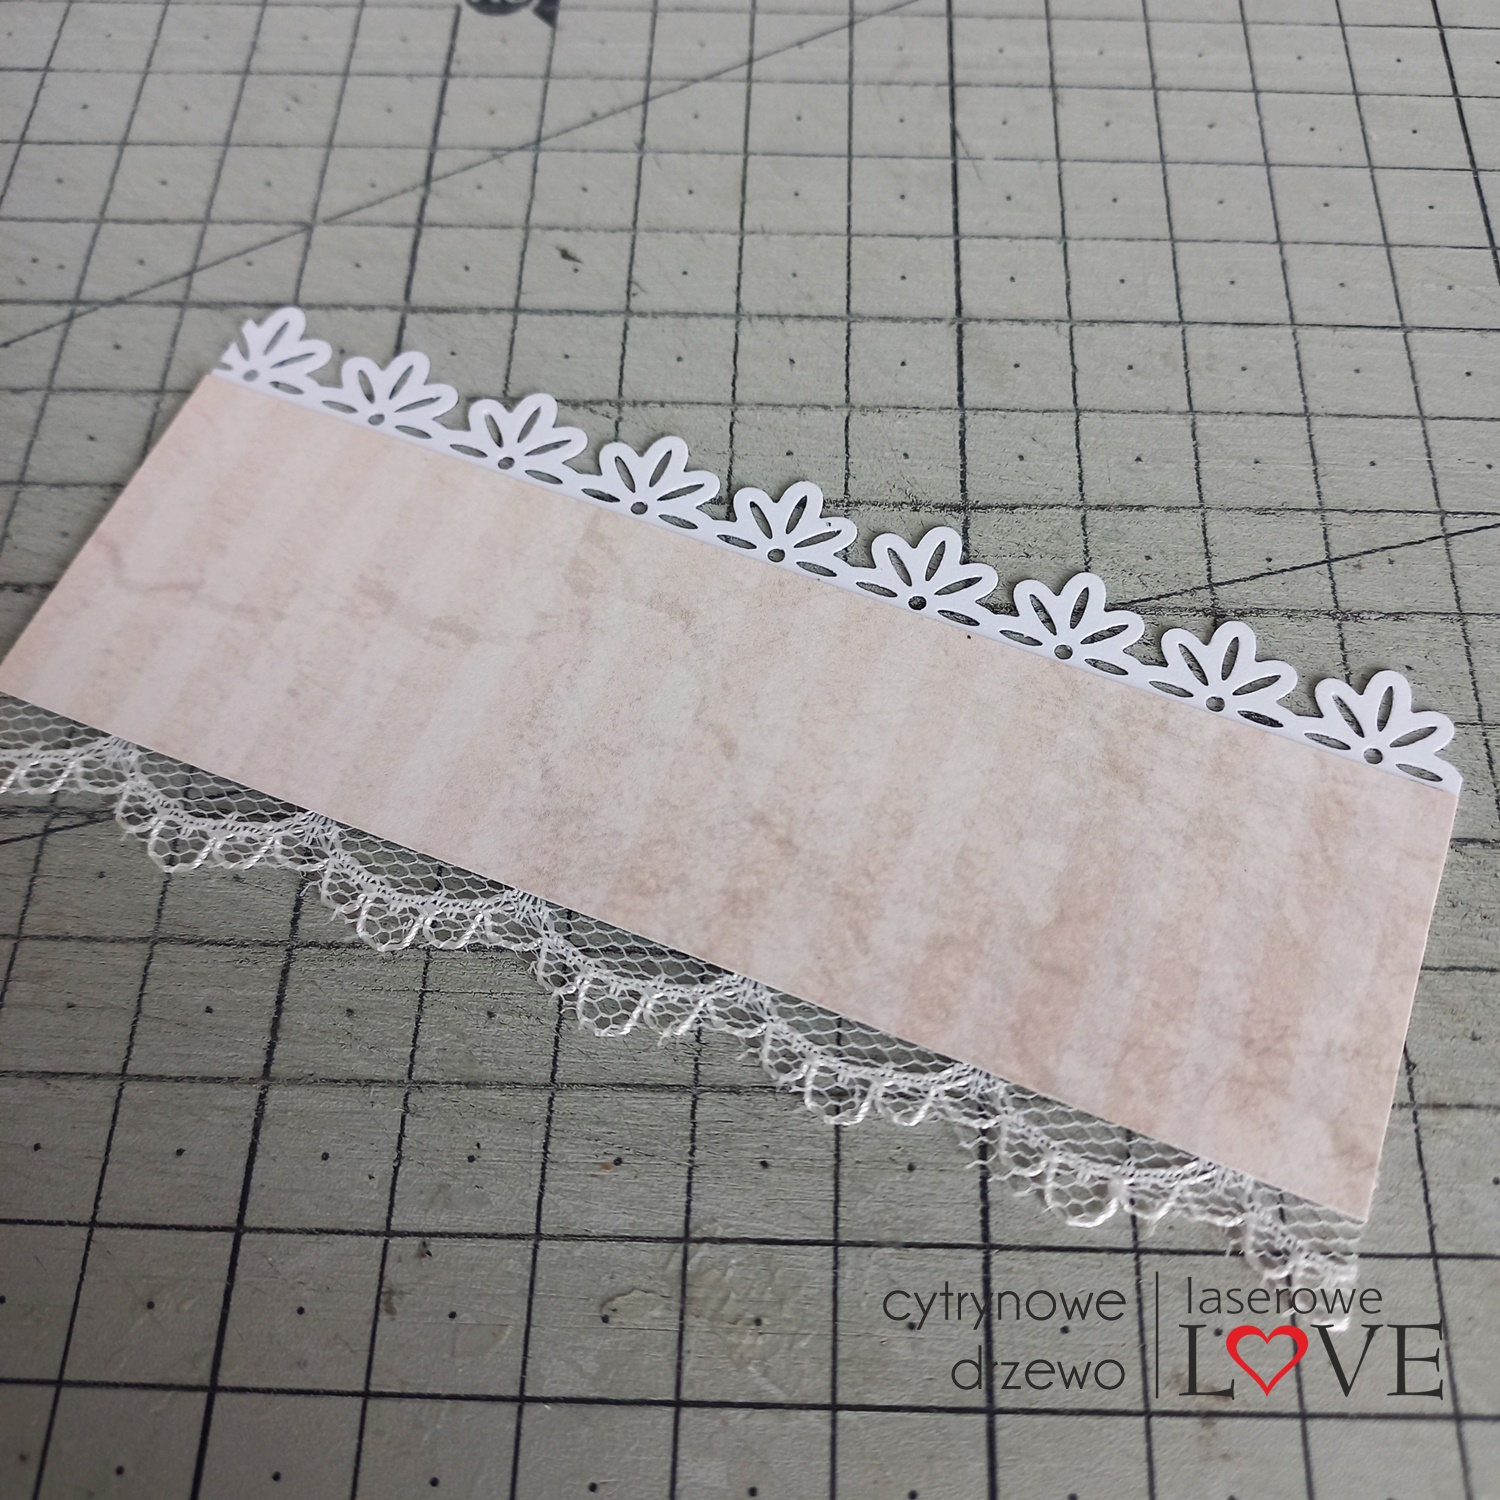
Krok 2 – Shaker box
Przygotujcie i dotnijcie papier, który będzie bazowym na Waszej kartce. Powinien być ok. 1 cm mniejszy od bazy kartki. Dodatkowo dziurkaczem brzegowym należy zaokrąglić jego rogi, aby nawiązywały do zaokrąglonych rogów ramki-shakera. Naklejcie go na bazę.
Step 2 - Shaker box
Prepare and cut the paper that will be the base of your card. It should be about 1 cm smaller than the base of your card. Additionally, with an edge punch you should round its corners, so that they refer to the rounded corners of the frame-shaker. Glue it onto the base.
 .
. 


- wykrojnik albo linijka i nożyk do wycięcia ramki
- dziurkacz brzegowy
- beermata albo taśma piankowa 2 mm
- gruba folia do shakera
- cekiny
- koronka
- tusz
- klej
- taśma klejąca dwustronna
- die cutter or ruler and knife to cut out the frame
- edge punch
- beermata or 2 mm foam tape
- thick shaker foil
- sequins
- lace
- ink
- glue
- double sided adhesive tape
Brak komentarzy:
Prześlij komentarz