Witajcie!
W przygotowania domu na Święta Bożego Narodzenia włączone są rączki naszych dzieci. W wielu domach nasze dzieci wykazują chęć na przygotowanie nietuzinkowych ozdób. Jak się za to zabrać? Skąd czerpać pomysły? Dziś pokażemy Wam kurs krok po kroku jak przygotować gwiazdę z torebek papierowych z ozdobną rozetą i mnóstwem tekturek.
Zajmie się tym nasza edukatorka Beata - Koraliki Beaty, która przygotowała dla Was świetny opis przygotowania.
O to, co pisze Beata: "Dzisiejszą inspiracją żegnam się z Wami drodzy blogowicze i facebookowicze. Po dwóch latach tworzenia i inspirowania Was tutaj pięknymi papierami i tekturkami, na sam koniec przygotowałam dla Was kolejny zwariowany pomysł. Od dawna chodziły za mną gwiazdy z torebek papierowych, dlatego realizacja mojego pomysłu powiększona została o ozdobną rozetę z przodu gwiazdy, na której umieściłam ogrom tekturek z kolekcji "Carol of the Elves"".
Hello Friends!
Our children's hands are involved in preparing the house for Christmas. In many homes, our children show a desire to prepare unusual decorations. How to go about it? Where to get ideas from? Today we will show you a step-by-step tutorial on how to prepare a star from paper bags with a decorative rosette and lots of chipboard.
Our educator Beata - Koraliki Beaty will take care of it, who has prepared a great description of the preparation for you.
About what Beata writes: "Today's inspiration I say goodbye to you, dear bloggers and facebookers. After two years of creating and inspiring you here with beautiful papers and chipboards, at the very end I have prepared another crazy idea for you. Stars from bags have been following me for a long time paper, so the implementation of my idea was enlarged by a decorative rosette in front of the star, on which I placed a lot of chipboard from the "Carol of the Elves" collection.

Przygotujcie / Prepare:
- papierowe torebki - ja użyłam ich 9 w rozmiarze 13 cm x 21 cm,
- paper bags - I used 9 of them, in size 13 cm x 21 cm,
- tekturki z kolekcji "Carol of the Elves": tekturka Elfa Keijo, tekturka z napisami, tekturka z prezentami,
- chipboards from the "Carol of the Elves" collection: Elf Keijo chipboard, chipboard with inscriptions, chipboard with gifts,

- elementy papierowe z kolekcji "Christmas Nutcracker" arkusz 06,
- paper elements from the "Christmas Nutcracker" collection sheet 06,
- klej na gorąco,
- poinsecję,
- wstążkę,
- anyż,
- szyszkę,
- białą farbę.
- hot glue,
- poinsettia,
- ribbon,
- anise,
- cone,
- white paint.
Krok 1
Na początku sklejamy nasze torebki - z kleju tworzymy literę T, mając torebkę ułożoną otworem do dołu.
Step 1
At the beginning, we glue our bags - form the letter T from the glue, having the bag placed with the opening down.
Krok 2
Ostatnią i pierwszą torebkę sklejamy razem, powodując rozwinięcie się torebek. Sklejamy na wszelki wypadek na środku, żeby się dobrze trzymały.
Step 2
Glue the last and the first bag together, causing the bags to unfold. Glue them in the middle just in case, so that they stick well.
Krok 3
Wycinamy z papieru 2 paski o szerokości 9 cm. Zginamy je co 1 cm. Tworzymy w ten sposób rozetę. Sklejamy te 2 paski razem tak, żeby z jednej strony się połączyły, z drugiej, żeby stworzyć koło.
Step 3
We cut out 2 strips 9 cm wide from the paper. We bend them every 1 cm. In this way we create a rosette. We glue these 2 strips together so that they connect on one side and on the other to form a circle.
Krok 4
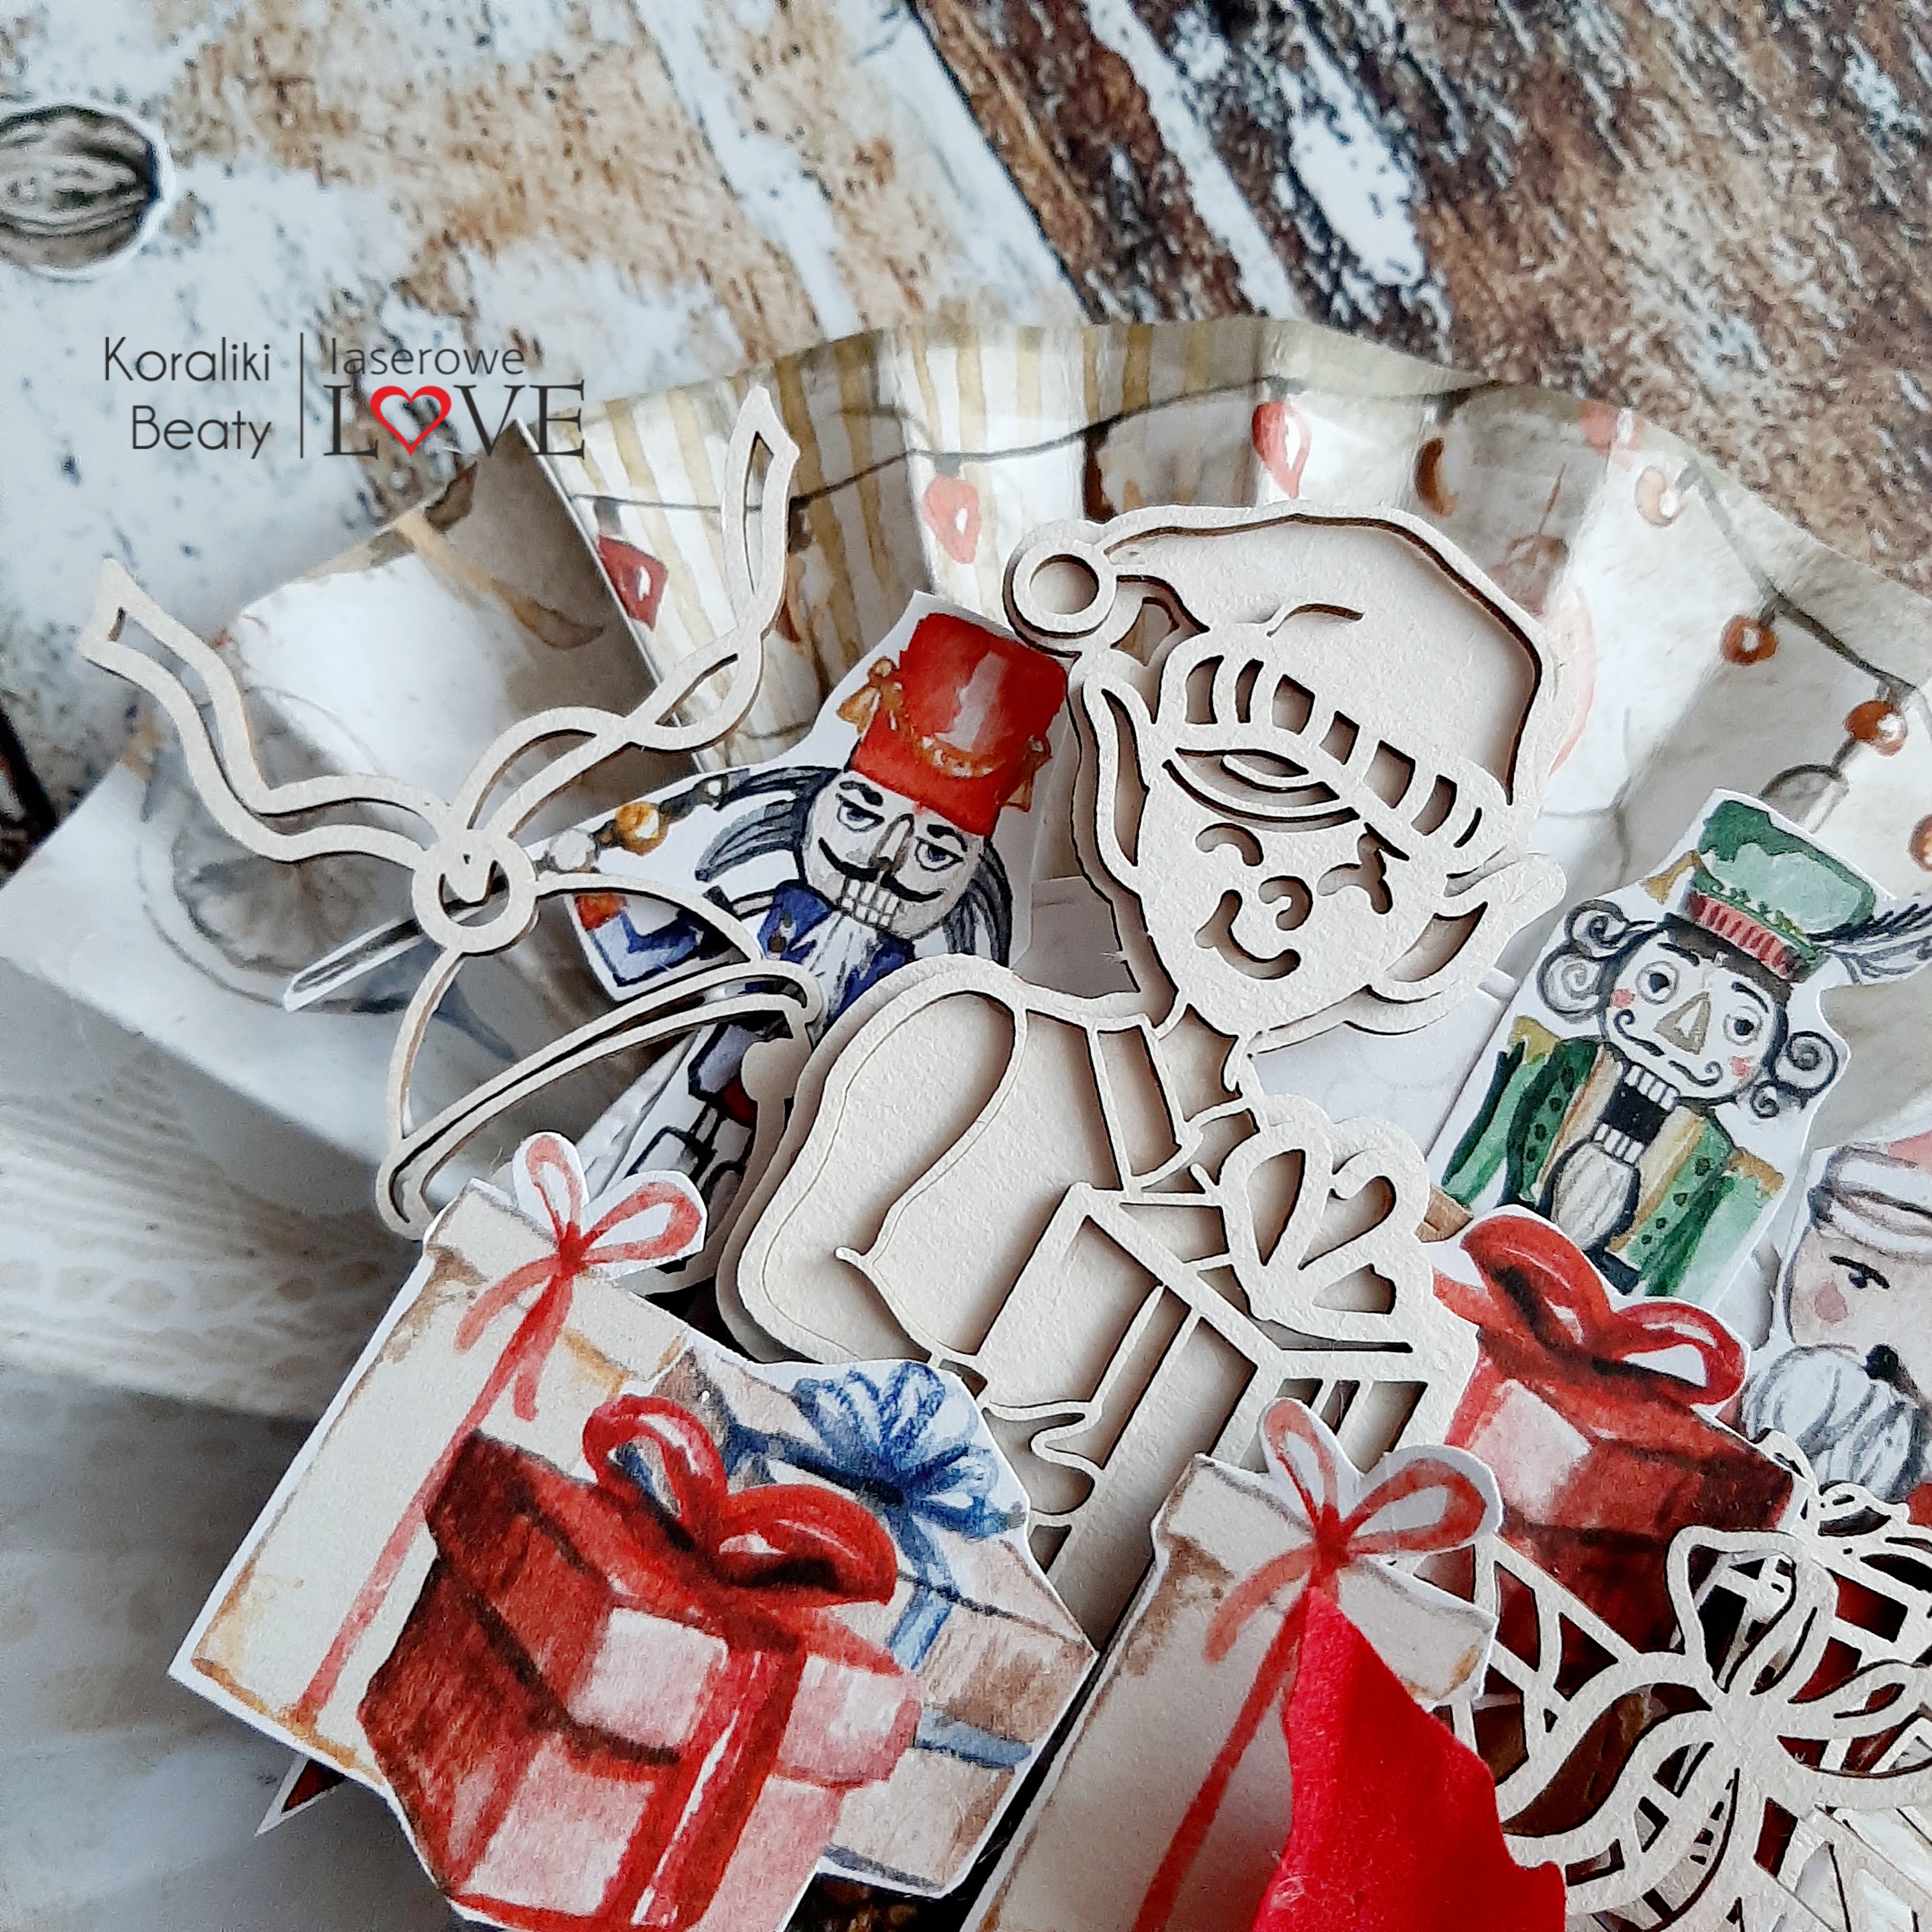
Na rozecie naklejamy kawałek tekturki, żeby usztywnić całość. Następnie 2 kółka wycięte wykrojnikiem: większe i mniejsze przekładając je dystansem. Na ostatnim kółku układamy kompozycję składającą się z elementów do wycinania i wyżej wymienionych tekturek. Wklejamy wszystko na zmianę tak, żeby całość kompozycji 3D nam rosła w górę. Mocujemy z boku wstążkę i poinsecje. Na środku jej wklejamy kryształek. Instalujemy także anyżowe gwiazdki i szyszkę.
Step 4
We put a piece of chipboard on the rosette to stiffen the whole thing. Then 2 circles cut out with a die: larger and smaller, putting them with spacers. On the last circle, we arrange the composition consisting of the elements to be cut out and the above-mentioned chipboards. We paste everything alternately so that the whole 3D composition grows up. We fasten the ribbon and poinsettias on the side. Glue a crystal in the middle of it. We also install anise stars and a cone.
Krok 5
Doklejamy tekturowy napis i całość chlapiemy białą farbą. Naklejamy tak przygotowaną rozetę na środek gwiazdy i możemy ją wieszać, gdzie tylko najdzie nas ochota.
Step 5
We add a chipboard inscription and splash the whole thing with white paint. We stick the rosette prepared in this way to the center of the star and we can hang it wherever we want.
Jeśli zainspirujecie się kursem Beaty, koniecznie pochwalcie się swoimi pracami w naszej grupie inspiracyjnej na FB -
Laserowe Love'rs.
If you are inspired by Beata's course, be sure to show off your work in our inspiration group on FB - Laserowe Love'rs.


.jpg)
.jpg)
.jpg)
.jpg)
.jpg)
.jpg)
.jpg)
.jpg)


.jpg)
Brak komentarzy:
Prześlij komentarz